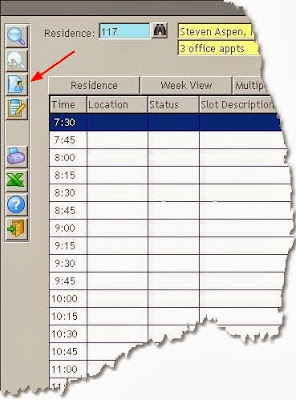
This special screen is activated by a button located on the left-hand side of the Scheduler called the Display Patient button. Selecting this will take you directly to the Display by Patient screen.
As soon as you identify the patient, you will immediately see all appointments ever made for this patient, both past and present.
Want to delete a specific appointment? No problem! Appointments can be deleted right from the Display by Patient screen. Once you find the correct appointment, just select the Delete button. You can even delete multiple appointments (such as all future appointments) by using Ctrl-left click to select all relevant appointments before pressing the Delete button.
Finally, you can press the Audit button to see exactly the same audit information that you see in the account. You will usually want to press the Scheduling tab when accessing the audit data from this screen.
Feel free to give this a try. Just take five minutes and see how many keystrokes and mouse clicks you can save!
Has this post been helpful? Will this information save you a lot of time? We'd love to hear your opinions! Let us know in the Comment section below or contact Client Services via the Feedback button.
Written by: Kylie McKenzie Soder


