Monday, August 15, 2011

Default Procedure Notes

So, quick, how can you bill CPT code 64483 for both left and right on the same day?  Would you enter it twice or use a modifier?  If so, what modifier?  Will Medicare accept or reject it? Hmmmm!

Multiply this tricky little case by 100, and you'll recognize why even the most experienced billers need a way to keep track of special-case instructions.  Rexpert release 9.3 gives you a way to enter this kind of information one time, and then gives you a visual warning (without a time-consuming pop-up) in Charge Entry when instructions/tips are available.

Open a Rexpert session and go to Settings->Procedure->Procedure Maintenance. Choose the procedure to which you want to add a note and click the Notes button.

(Click on any image to enlarge.)

Click the New Note button on the left-hand side of the window. Fill out the Type of Message (this should be set to Display, otherwise the note will only be visible if you come back to this screen) and the Message itself.  Once you have filled this out, click the Save button on the left-hand side of the window. You can enter multiple lines of information, if needed.


Later, when you are entering charges and use this code in the Procedure field, it will change from the regular light blue to a bright yellow. This means that procedure has notes that you can view.


To view those notes, press CTRL-D on your keyboard; press the CTRL key on either the left or right-hand side of the keyboard, and the D key at the same time. When you are done viewing the notes, click the OK button at the bottom of the Procedure Information window. If a procedure doesn't have notes, the Procedure field's background will not change colors.


There you have it! A quick and easy way to give yourself useful hints and tips when creating a charge.

Monday, August 1, 2011

Mobile Scheduler: Voice Login

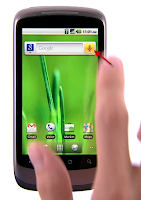
Voice Search is a feature included on Android smartphones with version 2.2 (Froyo) or higher. This allows you to use your voice to search Google, your history, or your bookmarks. Since the Apple iPhone does not include this feature, this blog post is for owners of Android devices. Add the web address for the phone scheduler to your bookmarks. Tap the Bookmarks icon in the top right-hand corner of the web browser and follow the instructions to add the web address.

Make sure your Android smartphone is awake and positioned to the screen where your Voice Search icon is located. If you don't have a Voice Search icon on any of your screens, tap the Applications button located on the bottom of any of your screens. Then, search through your application list until you find the Voice Search icon, and tap it.


A new window will appear that says Speak Now. Say in a clear and even tone, "go to Google bookmarks". If Voice Search interpreted what you said correctly, you will be taken to your, Google Bookmarks page where you previously added the phone scheduler's web address.


Tap on the website address of the phone scheduler to go to the login page. Sign in using your username and password and you will be able to see your schedule much faster than by typing in the web address every time.


 Contributors: Sullivan Wingerd and Solomon Staggs.